"My face looks big."
That line comes up in facial contouring consultations all the time. From there, the conversation usually moves to reducing the jaw.
The hard part is deciding how far to reduce. Take off a little and the difference is small; take off a lot and the distance from your original face grows with it. To see where that boundary sits, we applied three steps to a single face.
Stacked in three steps
Each step was applied on top of the result of the one before it.
- Chin length reduction: shortening a chin that runs long vertically
- V-line: softening the jaw angle, the side line of the jaw
- Cheek slimming: reducing the volume beside the lower face
 Original


Original — Before. The face sits in exactly the same position and size as in the steps below.
1. Chin length — The face gets shorter. Closer to "tidied up" than "changed".
2. + V-line — The jawline softens. Up to this point it barely shows.
3. + Cheeks — The width clearly narrows. This is where it crosses into "changed".
All four frames keep the face in the same position, so tapping back and forth makes it easy to spot exactly what moved.
Step 1 is "tidying"; step 3 is where "change" begins
It is the same face, but each step leaves a different impression.
- Step 1: the face gets shorter and the impression looks more put together. It is not immediately obvious which part changed
- Step 2: the jawline smooths out. It leans toward looking like a face that was always this way
- Step 3: the width narrows too, and the face shape itself changes. From this step on, the surgical feel becomes more visible
Which one is better is a matter of taste. But because step 3 changes the most, it also sits furthest from the original face. If you do not settle "how far" before surgery, even a good result can end up not feeling like your own face.
And yet the values that actually moved were 1 to 3mm
| Step | Lower-face length | Jaw width (jaw angle) | Face width (temples) |
|---|---|---|---|
| Original | 62.8mm | 101.3mm | 131.0mm |
| 1. Chin length | 61.8mm (−1.0) | −0.3 | −0.4 |
| 2. + V-line | 62.6mm (−0.2) | −0.8 | −0.6 |
| 3. + Cheeks | 62.3mm (−0.5) | −2.8 | −1.4 |
Here are the same measurements laid directly over the face.
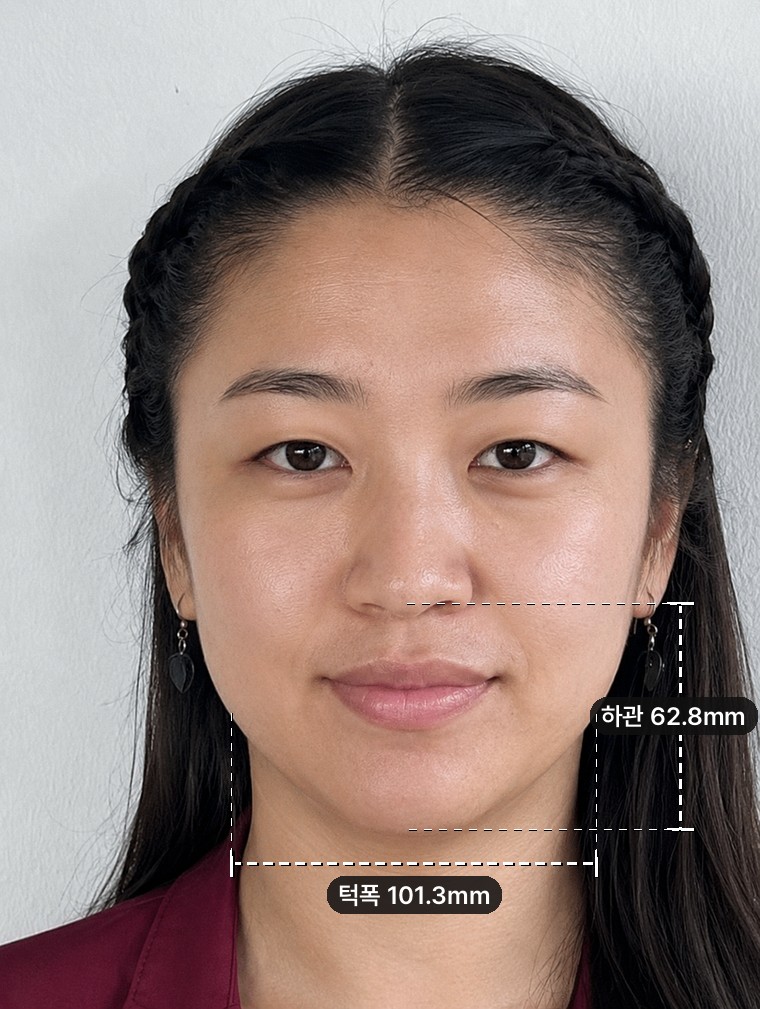 Original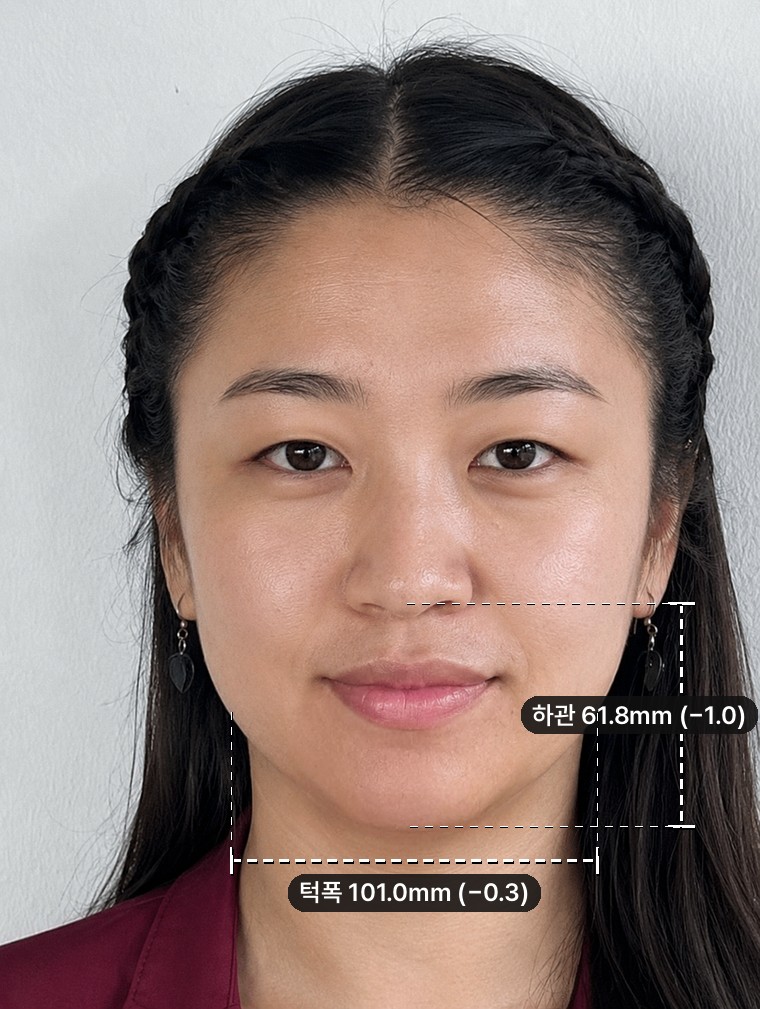
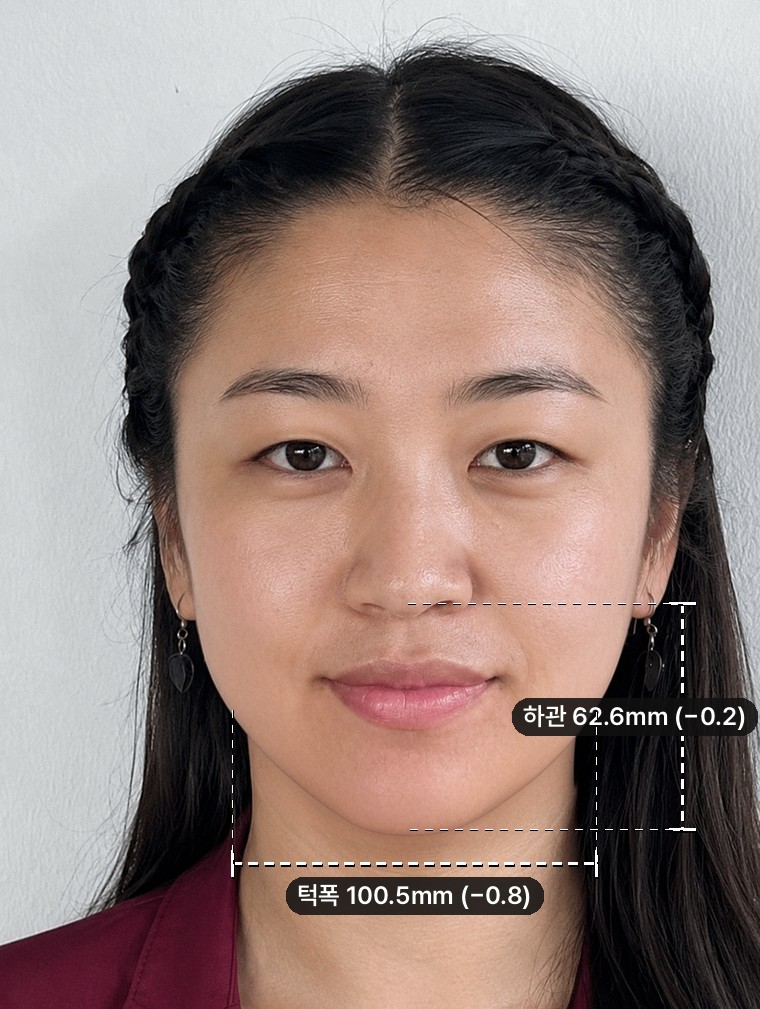
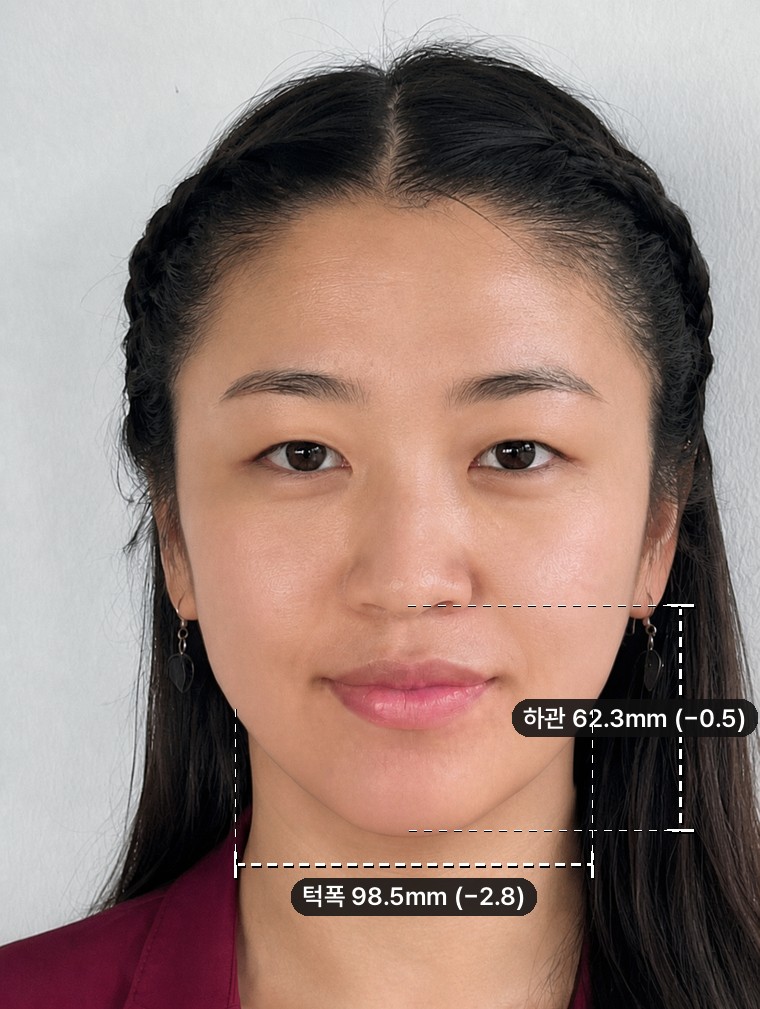
Original — Lower face 62.8mm, jaw width 101.3mm.
1. Chin length — Only the lower face moves, at −1.0mm. Jaw width is nearly unchanged.
2. + V-line — Jaw width −0.8mm. The lower-face length comes back up slightly.
3. + Cheeks — Final. Jaw width −2.8mm, lower face −0.5mm.
First ask whether width or length is the problem
One last point. Even under the same phrase "reducing the jaw", reducing width and reducing length are different operations.
Reduce only the width and leave the length alone, and the face looks slimmer but the impression of a longer face gets stronger at the same time. That is why step 1 (length) and step 3 (width) in the results above read in different directions.
Start by sorting out whether your face looks big because it is long, or because it is wide, and the options become much easier to organize.